I was asked to contribute to the Valentines Crop happening at Piece of Scrap. (http://www.pieceofscrap.org/) I took the opportunity to make something lovely for our walls.
I love red. I love handstitching. I love paper scraps and I love grids! I took all my favorites and made a simple Valentines wall art piece.
Supplies:
8 x 10 frame (I found mine at Kohl's for $7.00)
Various colors of floss
8 x 10 background paper
Patterned Paper scraps
Alphabet stickers
Buttons, brads, miscellaneous embellies
Pencil
Ruler
Heart template (I used a punch and used it as a stencil. A chipboard heart would work great too!)
How To:
1. To make the grid I found the middle of the page (5 inches down and 4 inches in)
2. From there I measured out and made boxes that were 1.75 x 1.75
3. Stenciled my heart template in pencil and stiched with floss.
4. Machine stitched my white grid lines (optional- you could simply erase them or go over them in a black pen)
5. Added my patterned paper squares.
6. Found 3 red alphabets for Love love love!
7. Ready to frame! I took the glass out and put it behind the paper for support.
8. Already thinking of making a St. Patricks Day one with shamrocks!
Showing posts with label Scrapbook Project. Show all posts
Wednesday, February 8, 2012
Tuesday, September 6, 2011
Happy Anniversary!
Happy Anniversary to my sweet husband Nick! The last 8 years have been full of adventure. Here's to another 8.
I don't make many cards, but when the occassion calls for it. . . Our wedding colors were red and yellow so I made those dominant. I made the patterned paper on the bottom out of important words/memories from our relationship.
Friday, July 8, 2011
Reversible Tote Bags
Both of my sisters celebrate their birthday's in August. Since I would be seeing them over the 4th of July I wanted to have their gifts ready. I found this tutorial for a simple, reversible tote bag.
Katie's Bag- the interior fabric with the leaves is the same fabric that I used for my newly painted bathroom's valance. I love the polka dot fabric so much that I may have to get more for myself. ![]()
Megan's bag- Her wedding colors were brown with lime green accents so this fabric was perfect for her.
I used fabric scraps and made them a padded zipper bag as well. Of course I had to make one for myself. It's a black and white pattern with red on the inside.
Mom- I have your fabric purchased and ready to sew :)
Friday, June 17, 2011
Vintage Hand-Me-Down
A while back my mother-in-law brought me a box full of sewing notions. Bias tape, snaps, clasps, zippers. Some of the goodies were Barb's and some were her mothers. I had been wanting to make a little zipper bag to protect my External Hard drive since I transport it in my purse daily.
I went to the box and found several brand new zippers still in the package. Well, brand new in 1955. The zippers were actually Nick's Grandmother's. She is no longer with us, but I think it is so cool that I am using something from her to create something new.
My finished zipper bag is about 7 x 7. The perfect size. I may have to make a couple more. They are so handy!
Tuesday, May 31, 2011
End of the Year Teacher's Gift
Next Monday is Bennet's last day of 4K. Her first year of school is already done. Before I know it will be September and she'll be back at school as a full fledged Kindergartner.
I wanted to make something for her teacher to thank her for being such an amazing teacher to B. I know a simple thank you note would have sufficed, but I've been feeling rather crafty lately. I was inspired by this wreath - HERE.
A couple weekends ago I made this yarn wreath. Look at me being ahead of the game!! I wanted the color scheme to be something that perhaps she could hang in her classroom so I went with primary colors. I added some good old #2 pencils and a matching ribbon. 

Friday, May 20, 2011
A little baby, a little art and a little sewing
Earlier this week I sent off a package to Minnesota. Specifically, a package to my sister Katie, brother-in-law Matt, 2 year old neice Molly Jo and their new daughter/sister Morgan. There was something for everyone.
When I had Scout, my BrrrBaby friend Molly sent us a personalized blanket with Scout's name on it. Since she was my 2nd girl, we already had plenty of pink and it was so nice having something made just for her. With that in mind I made this Subway Art for Morgan's nursery. I wanted to include all her birth stats. etc. I had it printed out as an 8 x 10 and framed it.
When I had Ellie, my BrrrBaby friend Amy made us a personalized jumper for her. She also sent along 2 crayon rolls and coloring books for B and Scout. With that in mind I made a crayon roll up using this tutorial. I packed it up with a couple of coloring books for Molly. I thought she would enjoy using it while on car trips to the cabin or Wisconsin. :)
And of course I couldn't leave out Mom and Dad. With a new baby brings even more photo opportunities. Even though they have a famcy camera strap already, I made them another one. (I made one for me too :) )
I hope the package brought a smile to their faces!
Monday, May 9, 2011
Nook Makes Me Happy
This year for Mother's Day the girls got me a Nook Color. I must have been really good because it's quite the gift. I was blown away! I received it on Thursday night and quickly downloaded a book, Night Road by Kristin Hannah. I finished it this morning and LOVED it. Loved the book and love reading on the Nook.
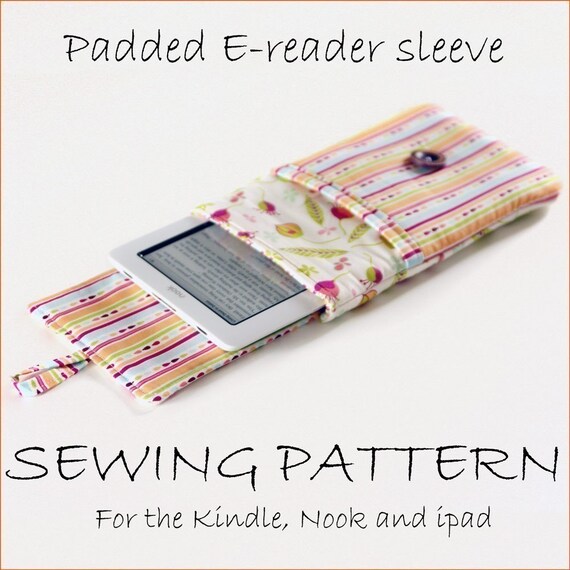
I planned on carrying my Nook with me in my purse so I needed something to protect it. I bought this pattern from Birdful Stitches.
Flowers that my thoughtful parents sent me for Mother's Day. Thanks Mom and Dad! This is my Spring/Summer case. I love the red, aqua and yellow! The project took less than an hour from start to finish. My kind of sewing!
It came together so quick and easy, that I had time to make one for my Mother-in-Law for her Kindle for Mother's Day.
Thursday, May 5, 2011
Teacher Appreciation Week
This week is Teacher Appreciation Week. I saw this idea on eighteen25 blog and knew it would be perfect for Scout's main teacher, Miss Carol. Of course what she really could use was a pair of ear plugs :) The photos aren't the best, but you get the idea.
Scout delivered it today and it was a huge hit!
Psst- Casie/Kim/Jess: I finally used that giant green ric rak I always talk about.
Tonight Bennet and I need to finish our card/gift for her teacher. Never a dull moment!
Thursday, April 21, 2011
Peep Bunny Banner
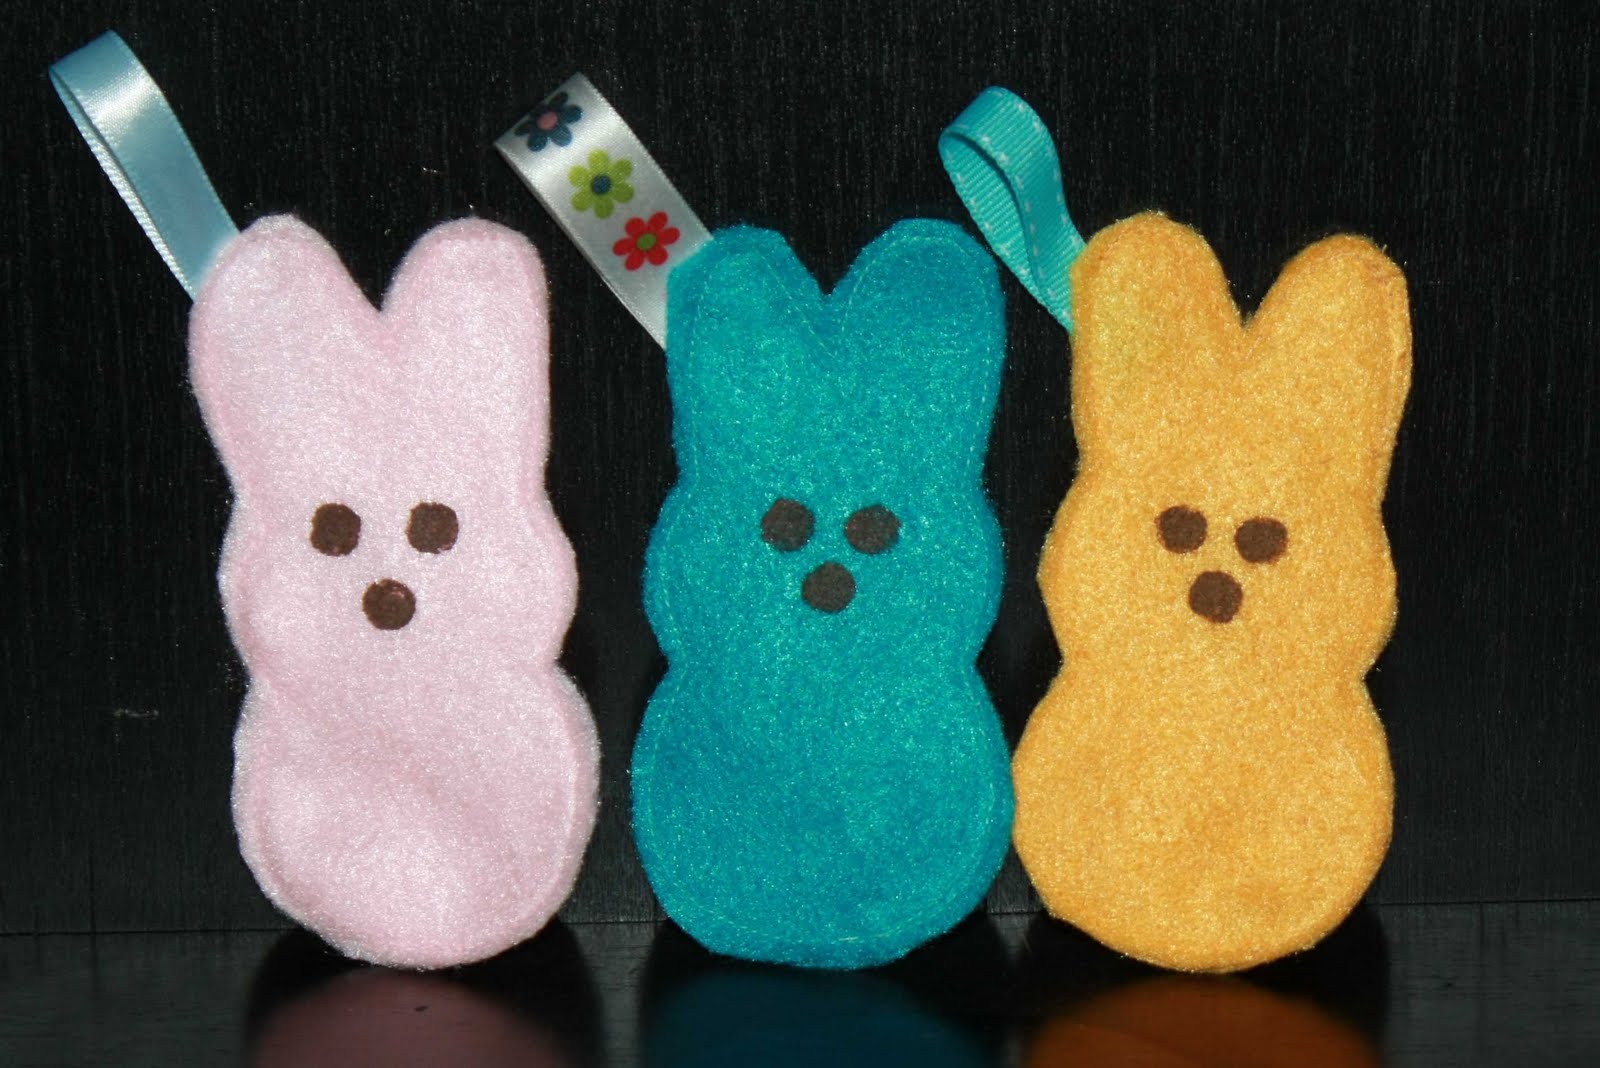
I saw this idea on the Dana-Made-It blog and since both my sewing machine and stash of felt were sitting on my dining room table I decided to make this cute Peep Bunny Banner. 
My mom has a branch that hangs in her kitchen. It is always decorated for whatever season it happens to be- Christmas, St. Patrick's Day, 4th of July and Easter. I made her 3 little Peep Bunny's that she can hang on her branch. 
Saturday, April 9, 2011
Homemade Chipboard Mini
I think that being somewhat of a product hoader and a scrapbooker go hand in hand. I often find myself keeping something thinking, "Oh someday I'll use that".
Well- I DID! (Yeah me!) I put together this super simple homemade minialbum using 1 sheet of 12 x 12 chipboard, 1 piece of patterned paper (with journaling squares) and other supplies.
I took my 12 x 12 chipboard sheet and cut it into 4"w x 8"h pieces. I just punched holes with a regular hole punch and bound with bookrings. Something to keep in mind is that with this vertical format that when you flip the page the opposite page will need to upside down from the previous one so it reads right.
This came together in little over an hour. I just focused on things going on in my life at the moment- no photos. All the supplies came from various Inspired to Scrap Kits.
Well- I DID! (Yeah me!) I put together this super simple homemade minialbum using 1 sheet of 12 x 12 chipboard, 1 piece of patterned paper (with journaling squares) and other supplies.
I took my 12 x 12 chipboard sheet and cut it into 4"w x 8"h pieces. I just punched holes with a regular hole punch and bound with bookrings. Something to keep in mind is that with this vertical format that when you flip the page the opposite page will need to upside down from the previous one so it reads right.
This came together in little over an hour. I just focused on things going on in my life at the moment- no photos. All the supplies came from various Inspired to Scrap Kits.
Monday, February 14, 2011
Ticket to Love Mini
HAPPY VALENTINES DAY!!
I took some coasters along with bits and pieces of the Inspired to Scrap Jan/Feb Happy Together kit and made a quick little mini-album for Nick for Valentine's Day. I knew those blank coasters would come in handy someday.

Wednesday, February 9, 2011
Colors of my Heart- Valentine's Day Crayons
My thoughtful mother-in-law picked up this heart shaped silicone mold for me last year on clearance after Valentine's Day and I've been waiting nearly 365 to use it. I tried making these crayons last year and failed misearbly. I had read on a blog that you could use the much cheaper plastic candy molds to bake them. Well- not the molds I bought. My oven ate them alive. This year I went with the real deal.
Crayons: I started with the mis-matched, broken and abused crayons from our stash. The first batch of co-mingled crayons worked ok. The second batch was all Crayola and it was far superior. The paper peels easier, they melt easier and cool more evenly.
Soak your crayons in ice water for 10-15 minutes and then peel. The paper comes off much easier and you don't end up with crayon under your nails.
Once out of the oven we put the tray outside for 15 minutes. They cool pretty fast in Wisconsin
Here is the finished product. I printed the cards out from The Long Thread
Thursday, February 3, 2011
Simple Valentine's Day Decor
I made this little project last year and couldn't wait to dig it out of the closet this February. I saw the idea on a blog last year but can't remember where.
Supplies:
Frame (I found mine in a 3-pack in the Target $1 spot. It’s about 5 x 5 square)
Wooden letter tiles (Scrabble or at your local craft store)
Valentines paper
Hot glue/gun
Simply add paper to the frame and glue the letters to the front of the glass. Quick, simple and full of love!
I think I may make a 'luck' one for St. Patty's Day.
Supplies:
Frame (I found mine in a 3-pack in the Target $1 spot. It’s about 5 x 5 square)
Wooden letter tiles (Scrabble or at your local craft store)
Valentines paper
Hot glue/gun
Simply add paper to the frame and glue the letters to the front of the glass. Quick, simple and full of love!
I think I may make a 'luck' one for St. Patty's Day.
Wednesday, November 24, 2010
Holly Jolly Christmas- ScrapFreak Dec. Kit
ScrapFreak's December Kit- Holly Jolly Christmas

I did two holiday themed layouts and one non-Christmas layout this month. I just loved the sheet of tiny alphas.
TITLE: Archive at 35
Design Notes: This is my favorite layout of the month. I had so much fun listing things about me from my past year. I used a bunch of the tiny alphas along with some Cosmo Cricket word stickers.
TITLE: Your Holiday Joy Shows
Journaling: This year you were old enough to get truly excited about Christmas. We loved singing carols, baking cookies & talking about the "nice or naughty" list. You were on the nice list for sure. 12/09
Design Notes: I cut up the die cut cards and added some patterned paper on the top. I layered the chipboard alphabet on light brown paper to provide some contrast/

TITLE: Labor of LoveJournaling: Nick spent hours toiling away in the garage making the girls rocking horse. Usually layered up to brave the cold, Christmas songs on the radio. Picking out the right wood and screws. Deciding on some special touches like the gold painted rope & embellishments. Everytime I'd go check on his progress I'd tear up a little bit. Such a wonderful gift from a father to his daughters. I can't wait to see their faces on Christmas morning. It's something they will always cherish. 12/09
Design Notes: I found the patterned part of the die cut paper to be distracting for this particular layout so I cut the center out and used the edge.
Sunday, November 7, 2010
The Holiday's are Coming- Paper Loop Wreath
You can run but you can't hide. The holidays ARE coming. ScrapFreak is currently hosting a FREE class titled, 12 Days of Christmas. We have 12 days of fun scrappy projects to help you decorate your house and get in the holiday mood.
Here is a project I made for Day 1. I've made this wreath in the past as gifts but I never made one for myself. Since my kitchen is a newly painted muted yellow, I thought it was time I made one for our home.
Don't be intimidated by this project. It takes around 1 hour to make from start to finish. With a wreath from the Dollar Tree is costs less than $10 to make!
I made step-by-step instructions complete with pdf download that are available at ScrapFreak. Check it out!
Here is a project I made for Day 1. I've made this wreath in the past as gifts but I never made one for myself. Since my kitchen is a newly painted muted yellow, I thought it was time I made one for our home.
Don't be intimidated by this project. It takes around 1 hour to make from start to finish. With a wreath from the Dollar Tree is costs less than $10 to make!
I made step-by-step instructions complete with pdf download that are available at ScrapFreak. Check it out!
Monday, August 9, 2010
Matt & Bennet- Paper Bag Mini
Here's another sample I made for ScrapFreaks FREE online class: Cherished Memories
I made this paper bag mini to highlight Bennet's special relationship with her Uncle Matt or as she calls him- Uncle Beer.
Although it doesn't have a lot of journaling I did a little interview with her about her thoughts on Matt and included her words. I will be adding additional photos and journaling into the pockets as time goes by.
I made this paper bag mini to highlight Bennet's special relationship with her Uncle Matt or as she calls him- Uncle Beer.
Although it doesn't have a lot of journaling I did a little interview with her about her thoughts on Matt and included her words. I will be adding additional photos and journaling into the pockets as time goes by.
Friday, June 18, 2010
He likes Zombies
Last year when I asked the girls what Dad liked they said, "Tissues". Based on that we made him a pink tissue box for his office.
This year when I asked the girls what Dad likes they said, "Zombies Mom. Dad really likes Zombies"
So- we made him an Ugly Zombie doll.
Scout picked out the grey wool felt. Bennet wanted purple brains and green writing. I just drew a template out and went to town. The red zipper came from a box of sewing notions that my mother-in-law gave me.

Thursday, April 29, 2010
Woo Hoo Wednesday- Mini Album
It's that time of year- golf season. Every Wednesday evening Nick has golf league so the girls and I do something special and fun together.
In less than a week we'll begin Woo Hoo Wednesday's for 2010. I'd better brainstorm some ideas. I'll be interested to see how Ellie fits into the mix.
I just wrapped up the mini-album I made of Woo Hoo Wednesday's from last summer. I used a Cosmo Cricket album and made some additional pages out of chipboard. All of the paper is Scenic Route Garden Grove which I bought at their Going-Out-Of-Business Sale. (still bummed about that).


In less than a week we'll begin Woo Hoo Wednesday's for 2010. I'd better brainstorm some ideas. I'll be interested to see how Ellie fits into the mix.
I just wrapped up the mini-album I made of Woo Hoo Wednesday's from last summer. I used a Cosmo Cricket album and made some additional pages out of chipboard. All of the paper is Scenic Route Garden Grove which I bought at their Going-Out-Of-Business Sale. (still bummed about that).
Subscribe to:
Posts (Atom)